The printer setup with Chromebook can be easily done by mentioned steps which is discussed in this article
Chromebook owner easily add/ install his HP printer or Canon Printer his device following steps –
Before installing his HP printer or Canon Printer you need to make sure that you have logged into your Chromebook device and Chromebook and HP printer devices are connected with Wifi.
Now you need to follow this printer setup instructions step wisely .
Lets start by connecting your Chromebook to a wireless Printer.
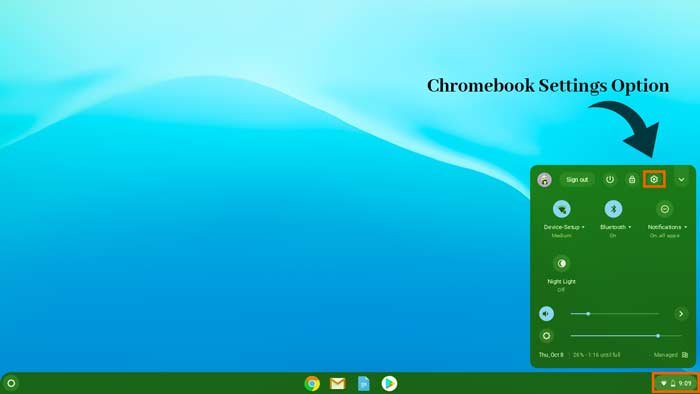
Step 1- Open your settings by clicking into the time section at the bottom right corner of your Chromebook screen and setting the gear Icon.
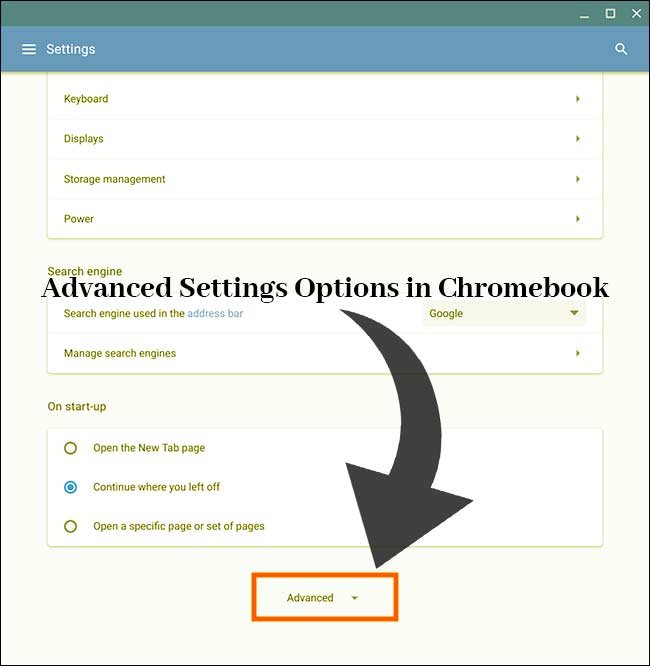
Step 2- In this step you need to scroll to the bottom and click on “advanced” option on the screen.
Step 3- In the ‘Printing’ section, select printers’ option
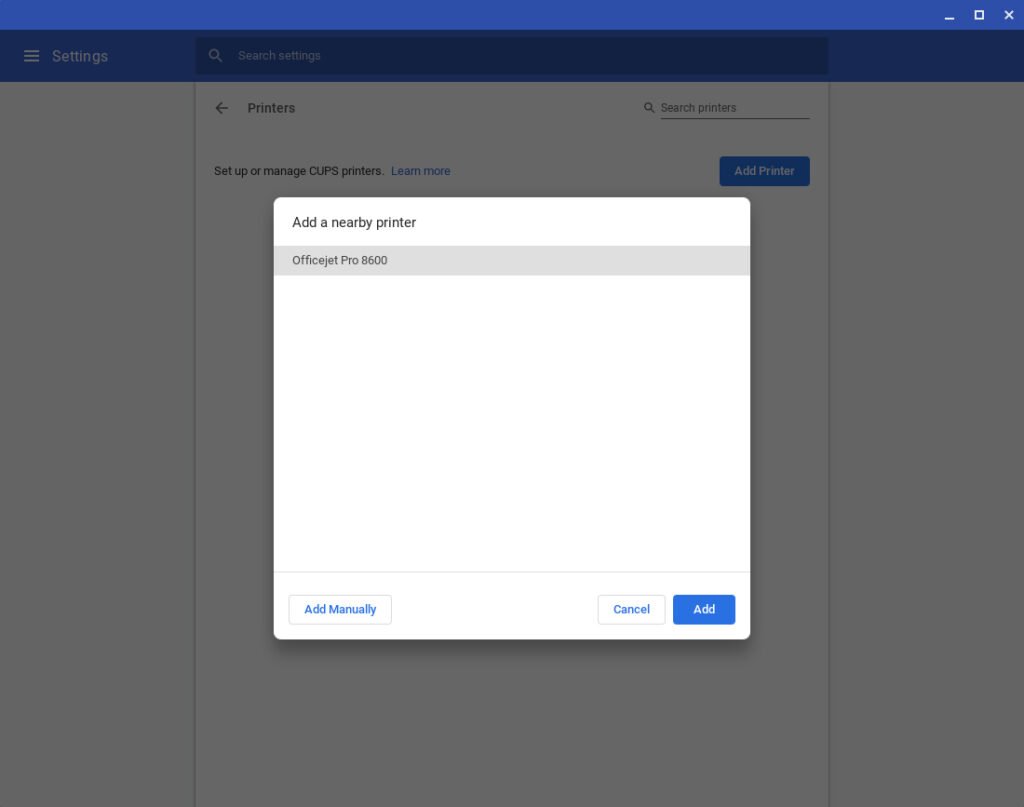
Step-4 Click over the ‘Add Printer’ option showing on your Chromebook screen
Step5– Now in this step you need to select your printer showing in the pop up and add it, if it is not showing you may need to search for it by clicking on “add nearby printer’. If want to add manually you can do by following on the screen prompt and yours printers directions.
Once your setup done you can print easily in the future
without much setup needed
You can follow this steps to connect HP
Officejet 7710 , HP offiocejet pro 8600 plus , Hp5740printers and Canon Printer wireless through
this instructions.

